|
I enjoyed putting these together, and im really happy with how they look! (click to enlarge)
0 Comments
Model making is something I am very new to, as each project goes by I gain more skills but this process was difficult. I was ambitious with my plan - I wanted to vaccum form a plastic shell for my pod, using blue foam as the mold. I then planned on assembling the shells in such a fashion that it could be opened to reveal interior views whilst being suspended between two scale columns. Creating the molds was difficult, I had to layer together several sheets as no blocks were available to me that were large enough to carve from. I layered with PVA glue and left the sheets clamped for four hours to set. 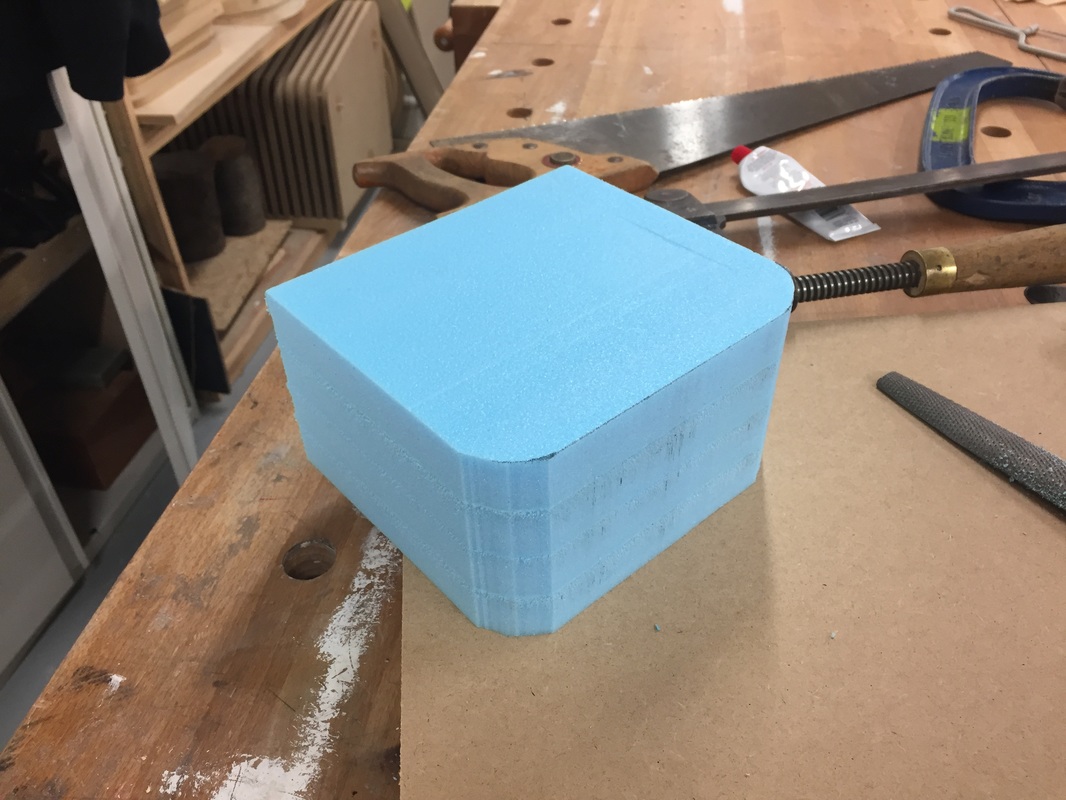 I then used a rasp and file to carve out the shape of my POD, i smoothed it over with sand paper after the shape was finished. This was good fun and reletivley easy to do, I had to be careful not to crack the layers open. 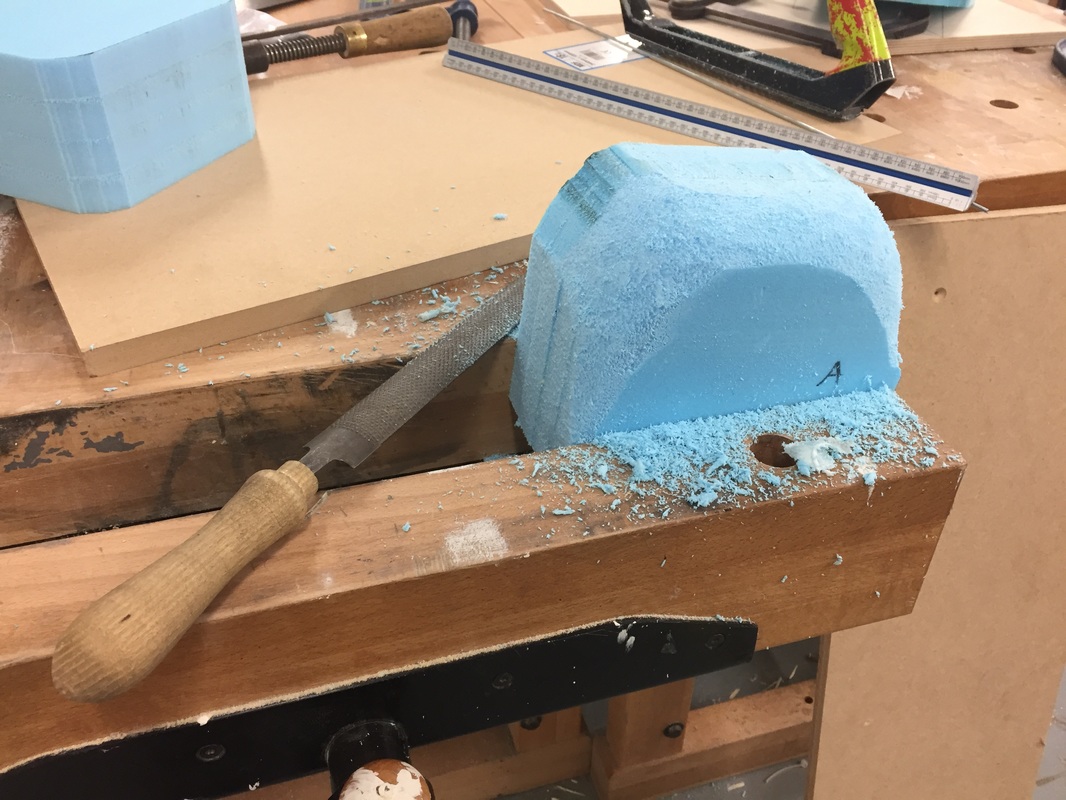 I then smoothed over the molds with Pollyfiller in order to make the molds as smooth as possible, and so that the foam wouldnt compress or melt during vaccum forming. 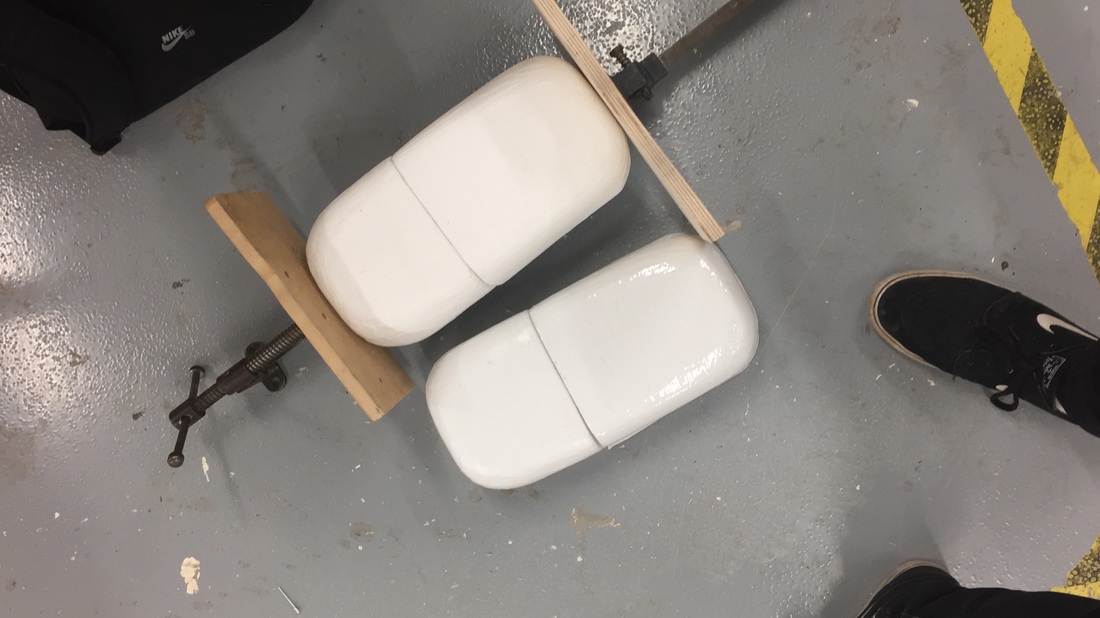 Above you can see a mold and also a finished plastic shell. The vaccum pressing process was very difficult, it took many attempts to get a finish I was happy with and I got through a lot of material. Unfortunaley at this point my plan fell down as I was unable to aquire further material in time for pin up, and I only had one half of the shell finsished to a quality I was happy with, Ive learnt from this and in future will allocate more time to make my model if vaccum forming is involved. 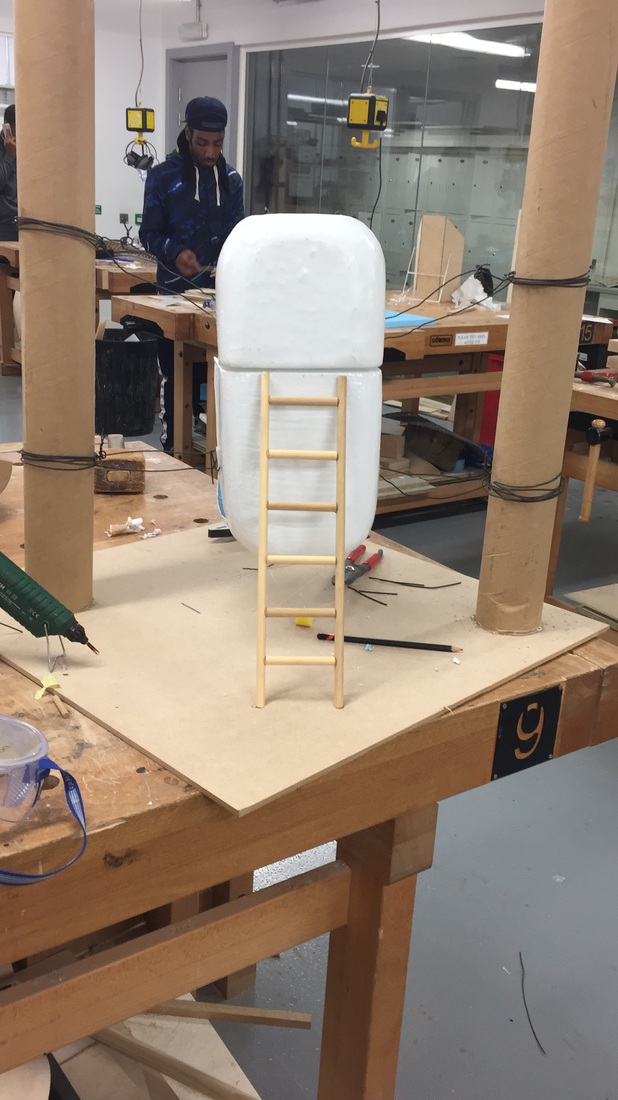 The last assembly of my model was rushed due to the issues with vaccum forming, im not happy with the finished piece and although it comunicates to some extent the form of my model its not close to the standard I had expected of myself. Im very happy with the rest of my work and hope that the depth and detail on my boards will successfully comunicate my ideas.
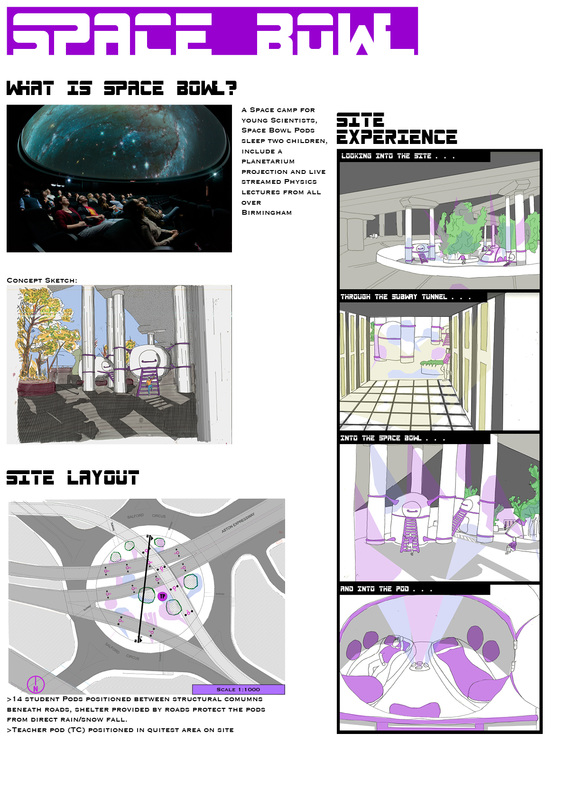
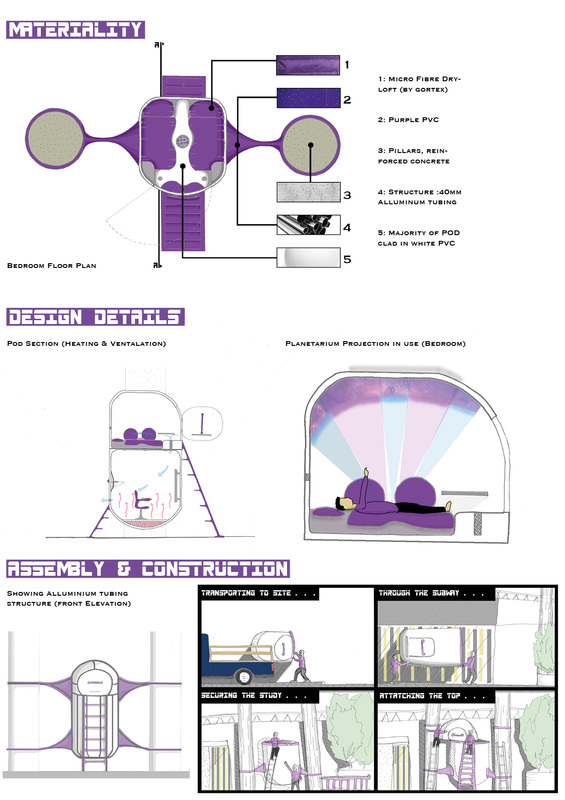
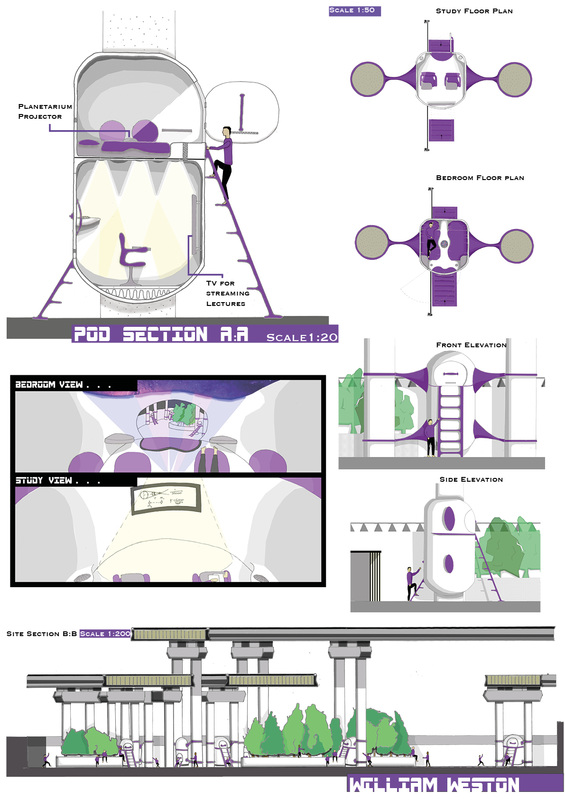
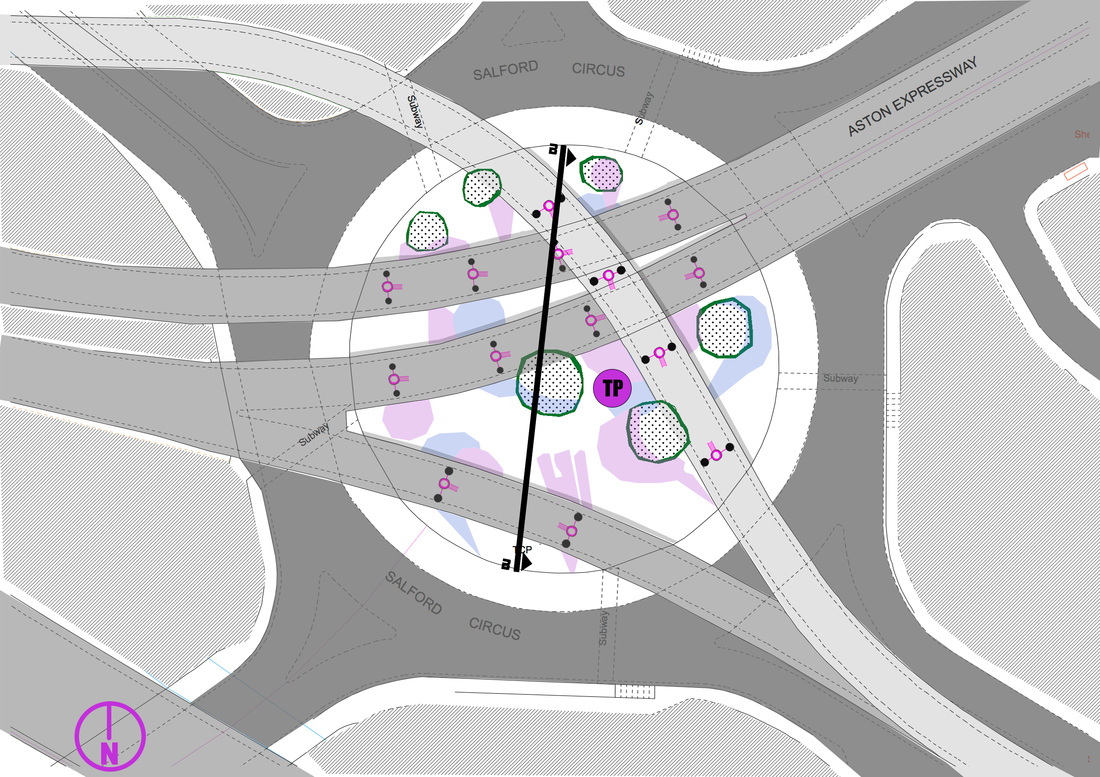
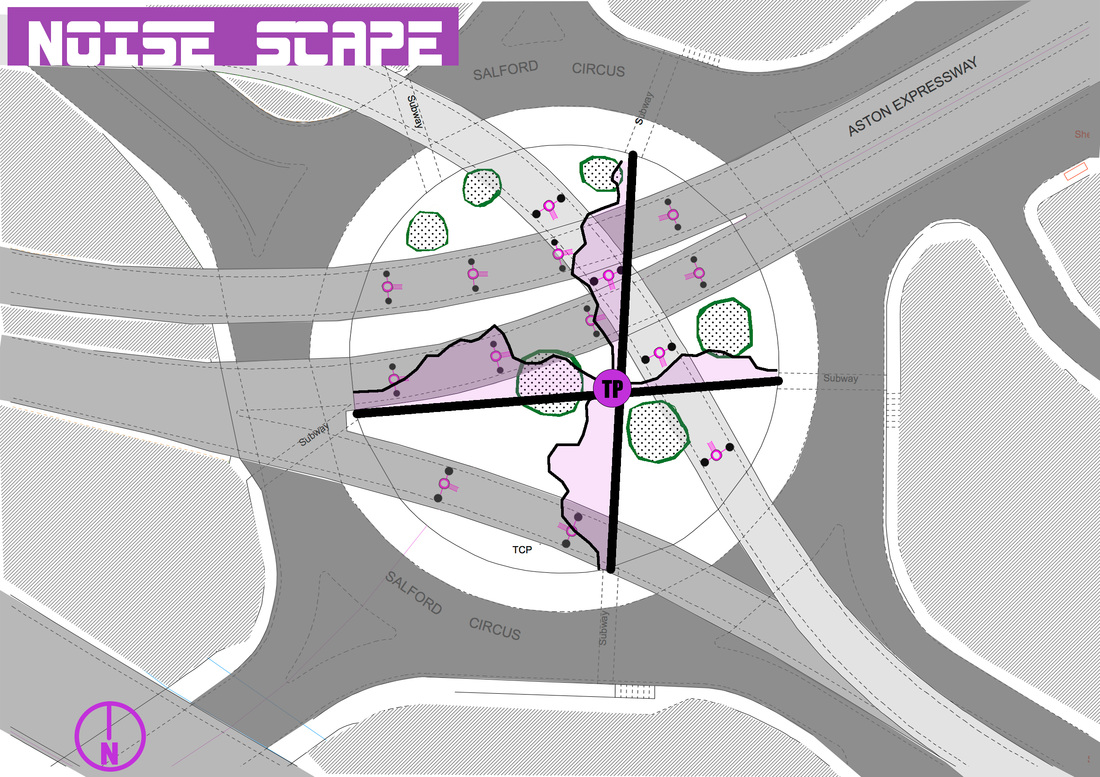
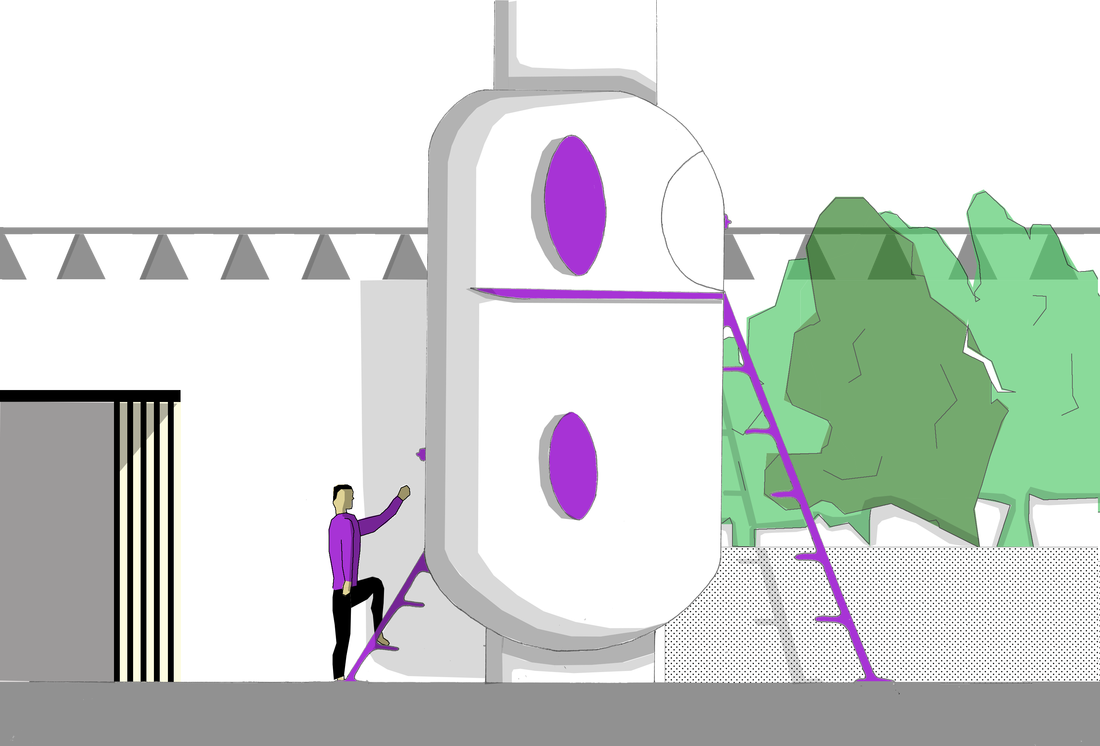
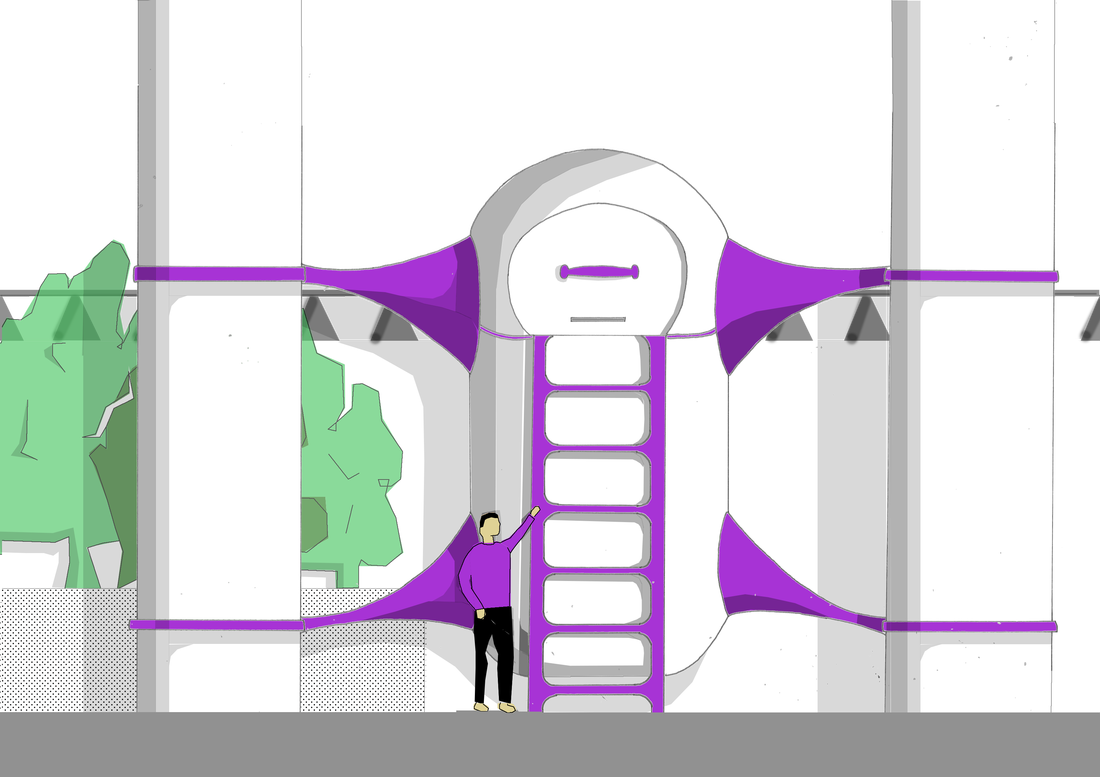
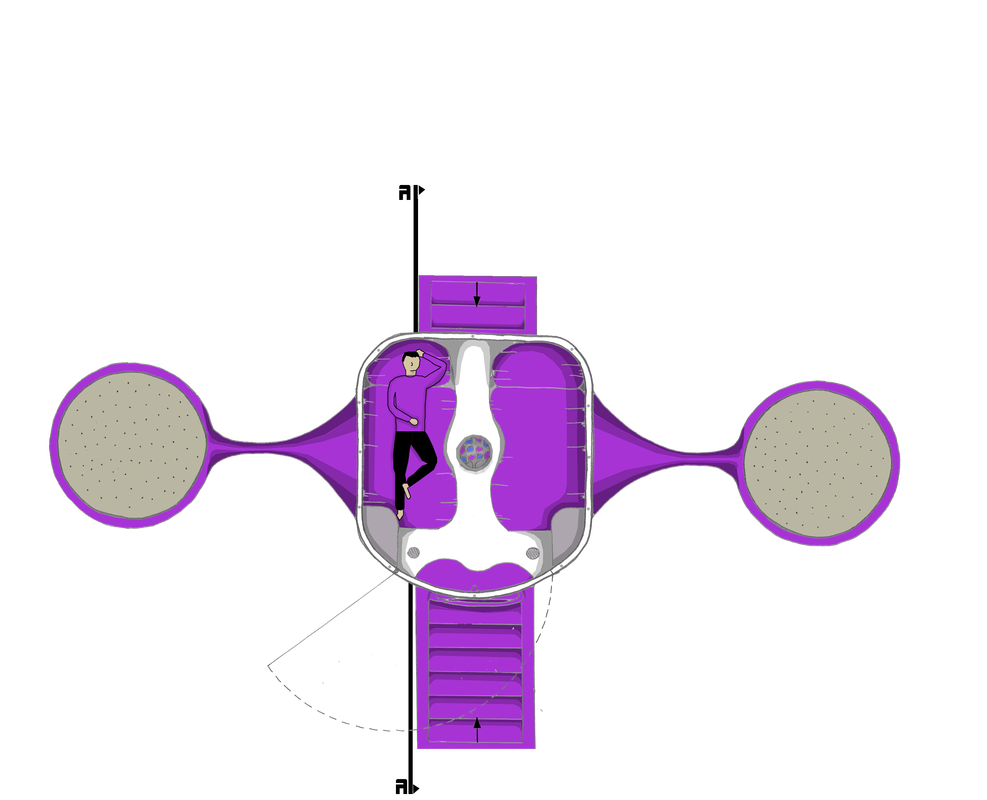
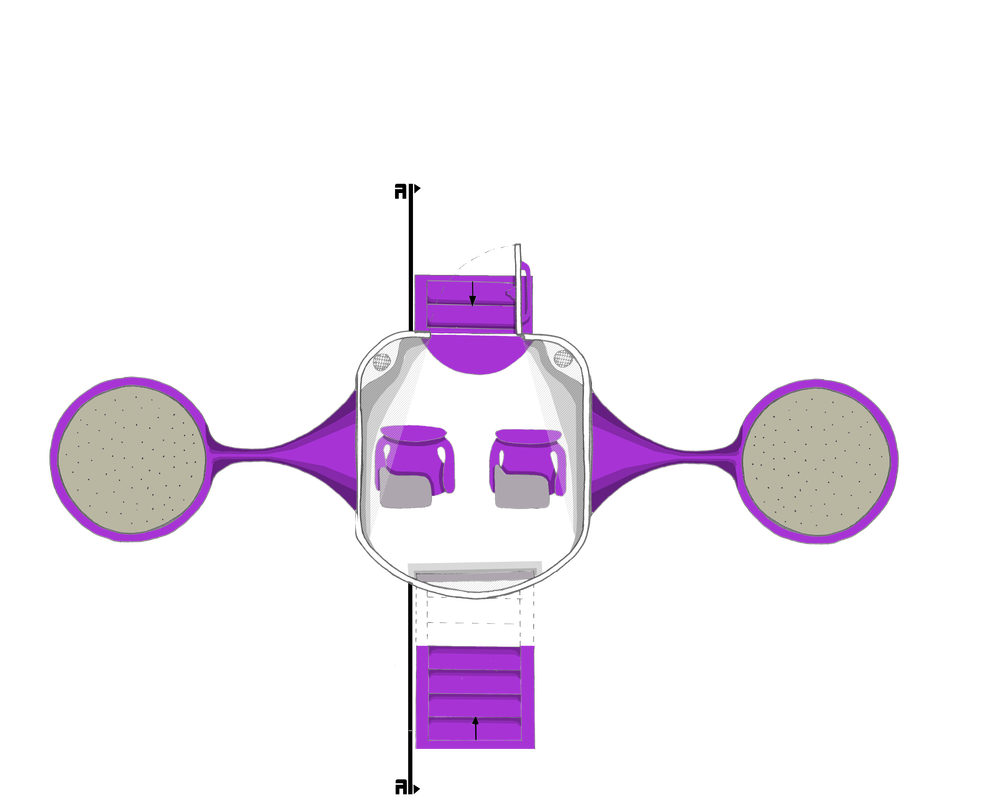
I decided to sketch and render some interior views of my pod to comunicate the thought that had gone into this element of the deisgn. I have stuck with the comic book strip aesthetic, one will be included on each board creating a fluid presentation 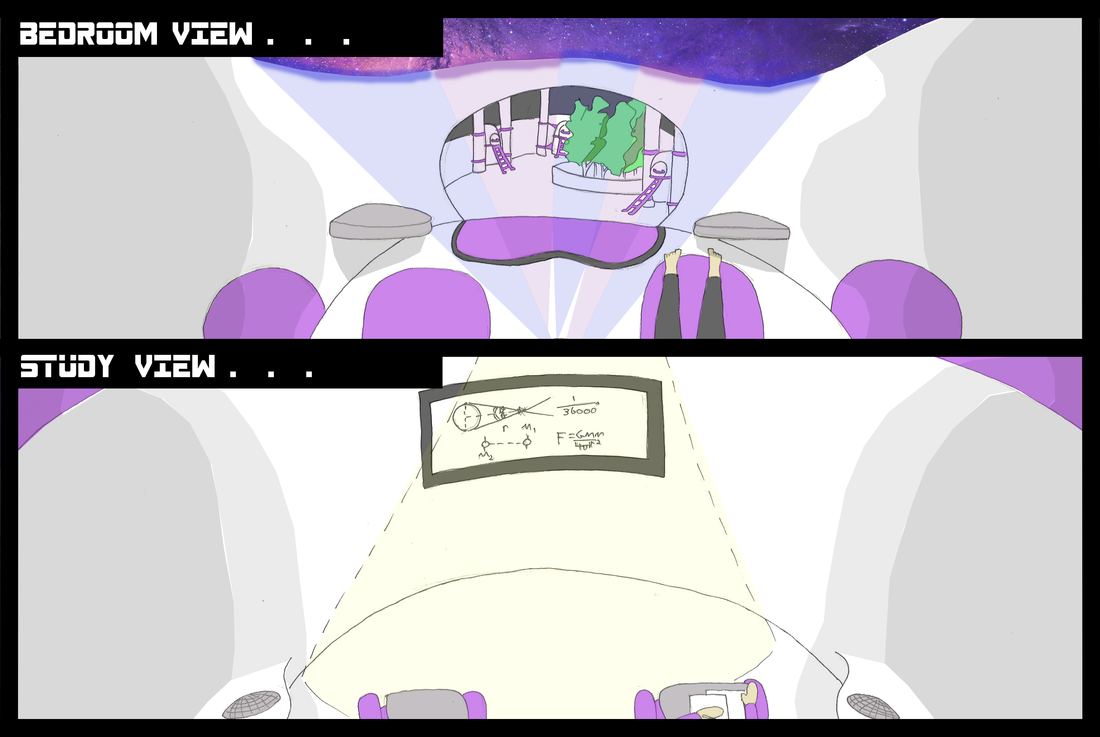 I liked my last comic book strip so much that I decided to create a second, this time to explain how the pod is to be assembled on site by the students. I would ideally like to spend a little longer rendering this one, but it is strong enough given the time scale 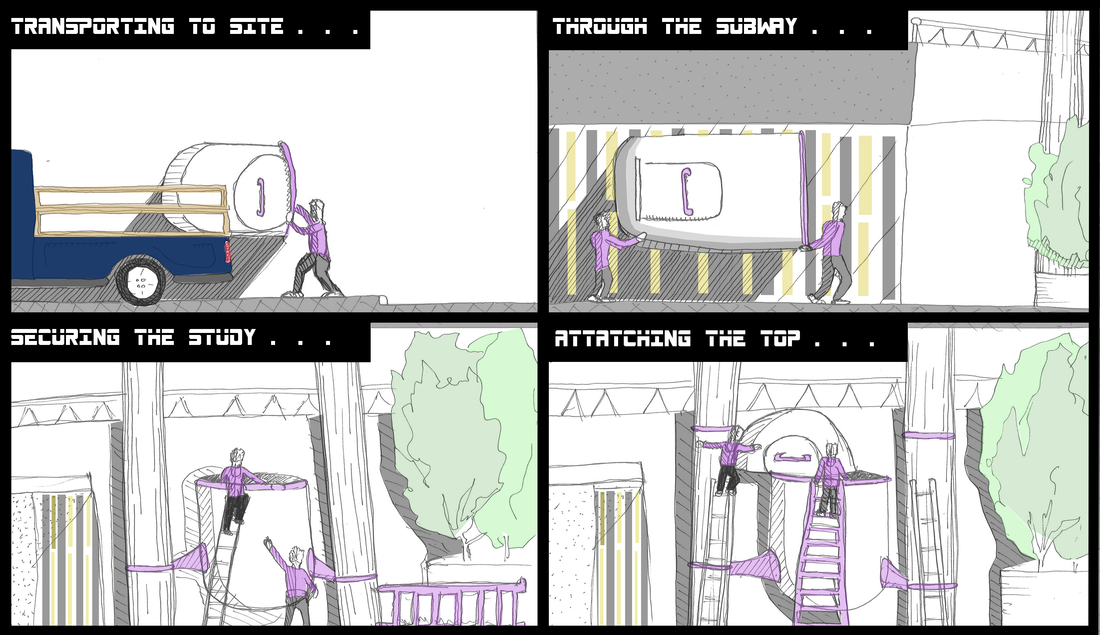 I decided to include a site section with my pods in context for my final board, im not yet farmiliar with CAD so it was a difficult process. I took measurements from a group forum where students posted site analysis and compiled this with scale plan drawings to hand draw the site section. It took a long time but im very happy with how it looks now, I then traced over and drew my pods in before rendering and adding people in photoshop. I really hope that the tutors like this piece, because I am very proud of it 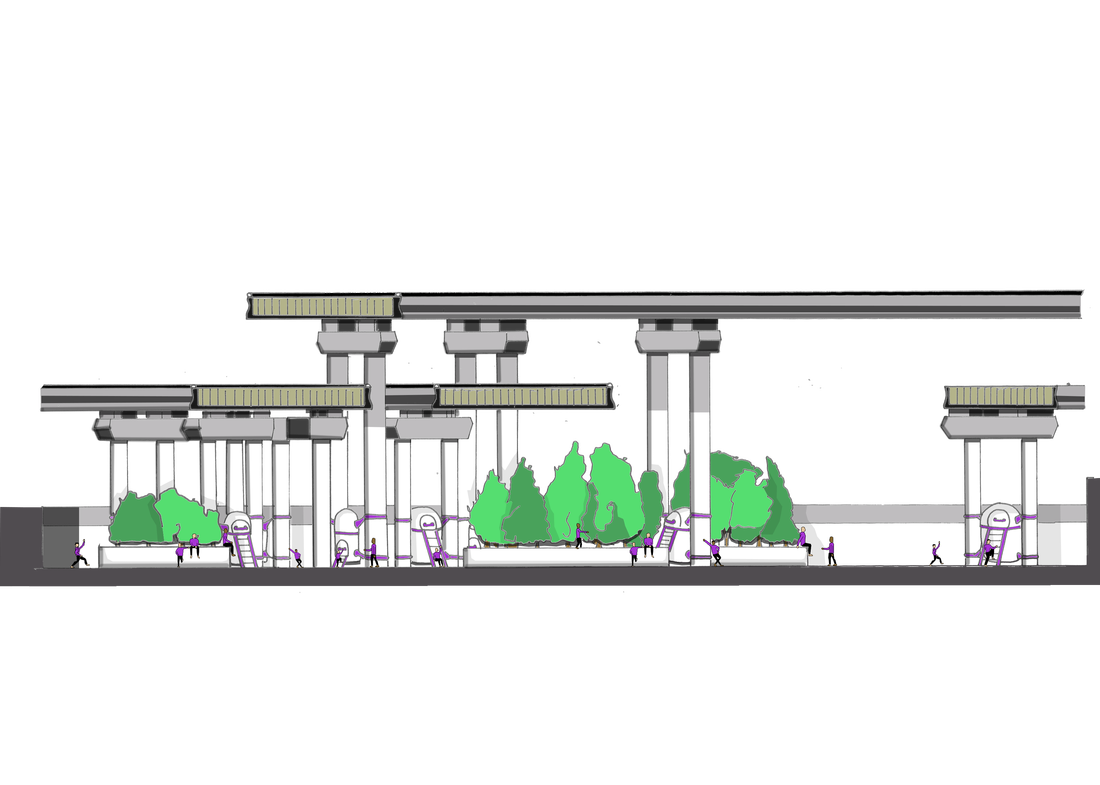 It is a requirement of this module that I include some site analysis in my final presentation, there is no point in me talking about elements of the site that will not effect my Pod Fest. Therefore I have developed some new graphics that discuss my Pod layout and environmental factors that explain my design decisions, im happy with the outcome aesthetically, and I think they will look nice on my board once it is all put together. From left to right - Pod layout/ sound scape/ rainfall I have began work on producing key elevations for my final board, I have atempted to show as much site context as possible in these drawings in order to comunicate how the design sits within the site! My design on the exterior is reletivley simple, so it was difficult to avoid these drawings looking somewhat flat, I have tried to add tone in photoshop to communicate depth. I am not 100% happy with the outcome however for the time scale im sure it will suffice (Click to enlarge) At this point I have finalised my Pod design but need to begin comunicationg this on paper, I took my time calculationg the dimensions of the Pod to be comfortable for the users, and transfering this into scale drawings proved a difficult task! After inking the drawings on trace I scanned them in and added some photoshop rendering and scale people to demonstrate depth. Below are some examples (Click to Enlarge). The theme and experience of my Pod/Site design is extremely important, rather than just place a Pod into the site I have decided to transform the whole area to create a themed experience for the residents. In order to portray this I have created a story board shouwing the journey from outside the Pod - to inside the bedroom during night (when the theming will be strongest! I have developed this piece in a cartoon esque style and im happy with how it turned out 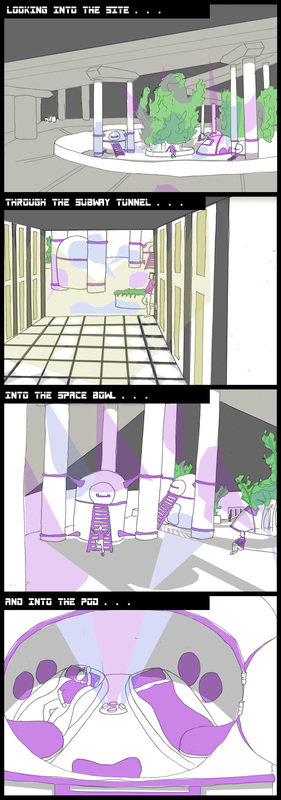 Im homing in on my final design for the POD and beginning to develop the details a little further as I refine the aesthetic, below is a sketch board I put together to illustrate my ideas so far 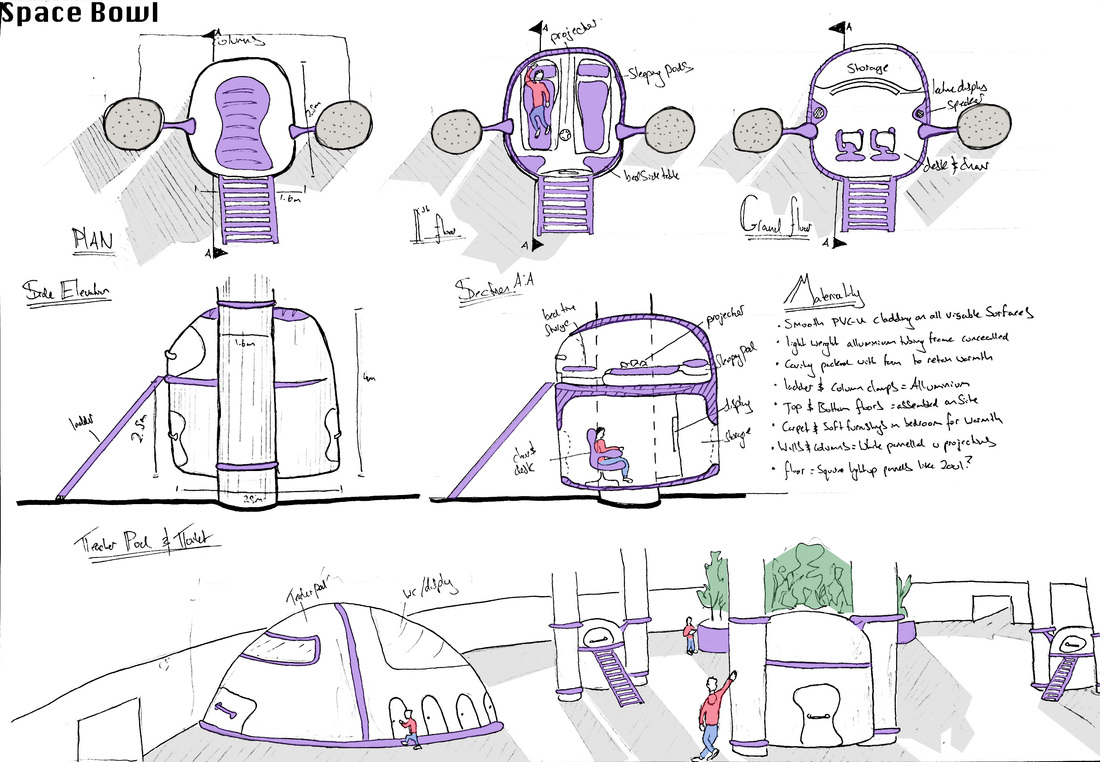 |


 RSS Feed
